Inspections
One of
the primary functions of Inspection Butler
is to organize and archive Inspection records.
Notes from each inspection can be captured in Inspection Butler in a very organized manner,
which relates the notes to a specific Permit.
The process is started by clicking on the Inspections button on the Main Panel:
Doing this will bring up the Permit Search panel:
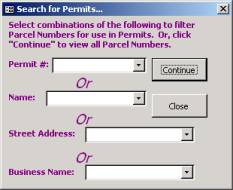
A complete discussion of the use of this Search panel can be found under the Search section. The remainder of this section assumes working knowledge of the Search panel.
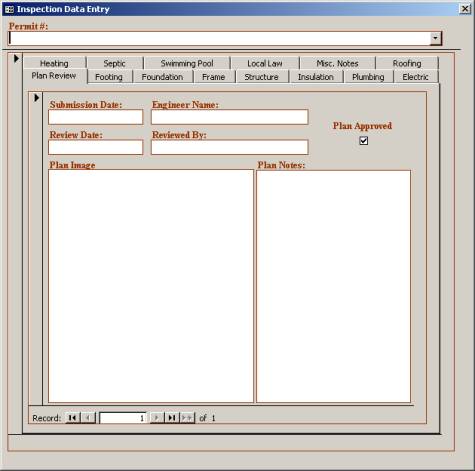
Once the Permits to be selected from has been narrowed appropriately through use of the Search panel, the Inspections panel will be displayed:
At the top of the panel is a drop-down selector. This selector is used to select the previously-issue permit to which the inspection information that is about to be entered will be associated. A permit is selected by clicking the mouse on the drop-down arrow in the upper right hand corner of the Inspection Panel. This will display the permits that were filtered using the Search Panel:
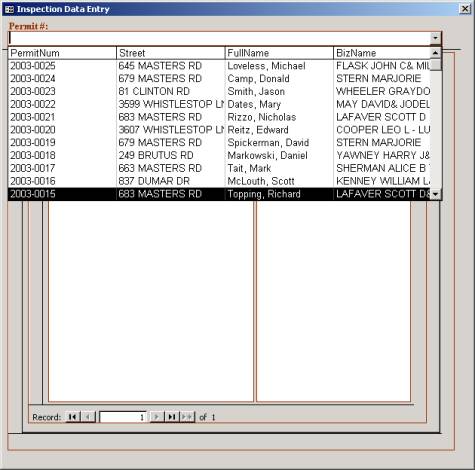
Note: the permits displayed in the drop-down are listed in order of permit number, most recent ones first. Also, for each permit number, the street address, POC name, and Business Name, if applicable, are listed to help guide the user to the correct permit number to choose.
Choosing the correct permit number is as simple as clicking on the desired number with the mouse. The scroll bar to the right of the Business Name field can be used to scroll through the complete list since only subset of permit numbers will be listed at any one time.
When a permit number has been selected and no inspection information has been previously entered, Inspection Butler will inform the user that there is no current data for this permit and asks if a new record should be created:

Clicking the “Yes” button will create a new Inspection record for the permit selected and will display the Inspections Panel with the correct Permit Number at the top. The Inspection Panel is composed of three basic sections:
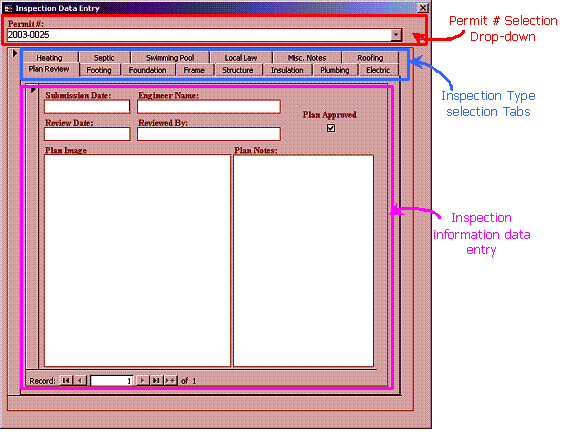
The first section, the permit number selection drop-down, was discussed above.
The second section, the Inspection Type Tabs, all the user has to do is to select the type of inspection for which information will be entered or displayed. For example, if a Foundation inspection was conducted for a given permit number, then one would select that Permit number then click on the Foundation tab. This will switch the view to the Foundation data entry section – the third section of the Inspection panel – is displayed. The Foundation inspection notes or narrative can then be entered into the data entry section for that inspection.
Among the Inspection Tabs, there are essentially 4 formats for the data entry section. The first format is the same for each of the following tabs: Footer, Foundation, Frame, Structure, Insulation, Plumbing, Electric, Heating, Swimming, Roofing, Pool, Misc. Notes. That format looks like this:
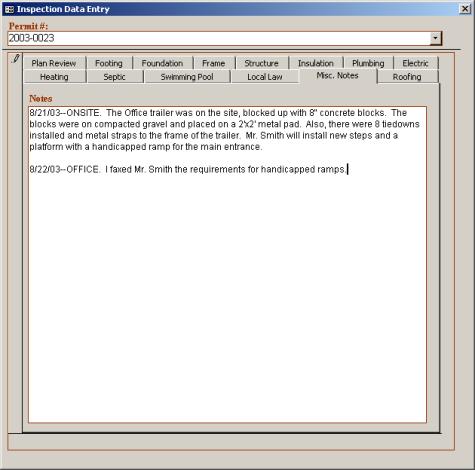
This data entry section format provides a simple text entry box into which one would type the inspection narrative for the specific inspections conducted. Each entry is preceded by the date – this is a very good practice and will be helpful in the future. Blank lines can be inserted by simply typing the Enter, or Return, key on the keyboard. The data entry box allows up to 65,000 characters to be typed. This is roughly 20 pages of text. When so much text has been entered that it fills the data entry screen, a vertical scrollbar will be displayed on the right of the text box allowing one to scroll up and down within the data entry view.
The Septic data entry view is formatted slightly differently than those inspection sections just described:
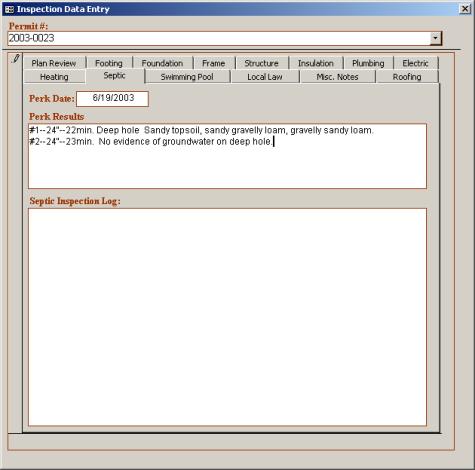
In addition to having a general inspection text entry box, the Septic inspection Tab also contains a Perk test date field and a Perk results data entry field. The data field works just like any other date field within Inspection Butler. The Perk results field is text entry box that acts in the same manner as other text entry boxes such as the one described above.
The Local Law Inspection panel Tab is very similar, but it contains four data entry boxes:
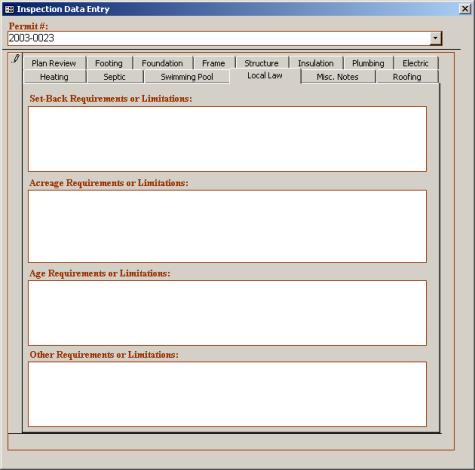
The boxes are likely self-explanatory. The intent is that if there are specific local law restrictions or stipulations associated with the permit or the inspections conducted, this information can be entered here.
The Plans Review data entry Tab is little trickier and offers more functionality than the other Inspection panel tabs:
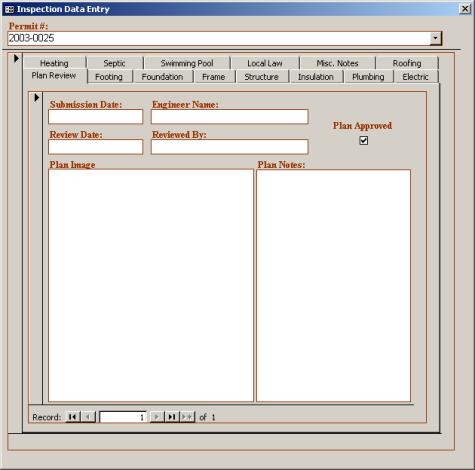
The intent of the Plans Review tab is that the initial plans for the permit can be reviewed and the notes associated with this review can be entered here. This is done in the Plan Notes section, which is a general text box entry tool and works in the same manner as the other text box data entry boxes discussed.
Along with the Plan Notes box, one can utilize the data fields on the Plans Review tab to indicate when the plans were submitted and reviewed. There are also text entry boxes where the submitting name and the reviewing engineer’s names can be listed.
Finally, building plan images can be entered directly into Inspection Butler via the Plan Image box. What this means is that images – either electronic drawings, or photographs, or scanned images of paper plans – can be copied into the inspection records for a permit. The procedures to follow in order to do this are discussed under the Plans Review section.